Kirby Nature Trail -Big Thicket National Preserve

Have you ever seen a cool swampland shot in a movie and wondered what it would be like to be there? Well here is your chance to do just that! Big Thicket National Preserve is a combination of forest trails and bayou swampland that snakes in and out of several towns. The Preserve hosts lots of hiking trails as well as kayaking trails. Brandon and I went out to explore the area for a quick hiking expedition and the Kirby Nature Trail was the perfect fit.

Visitor Center

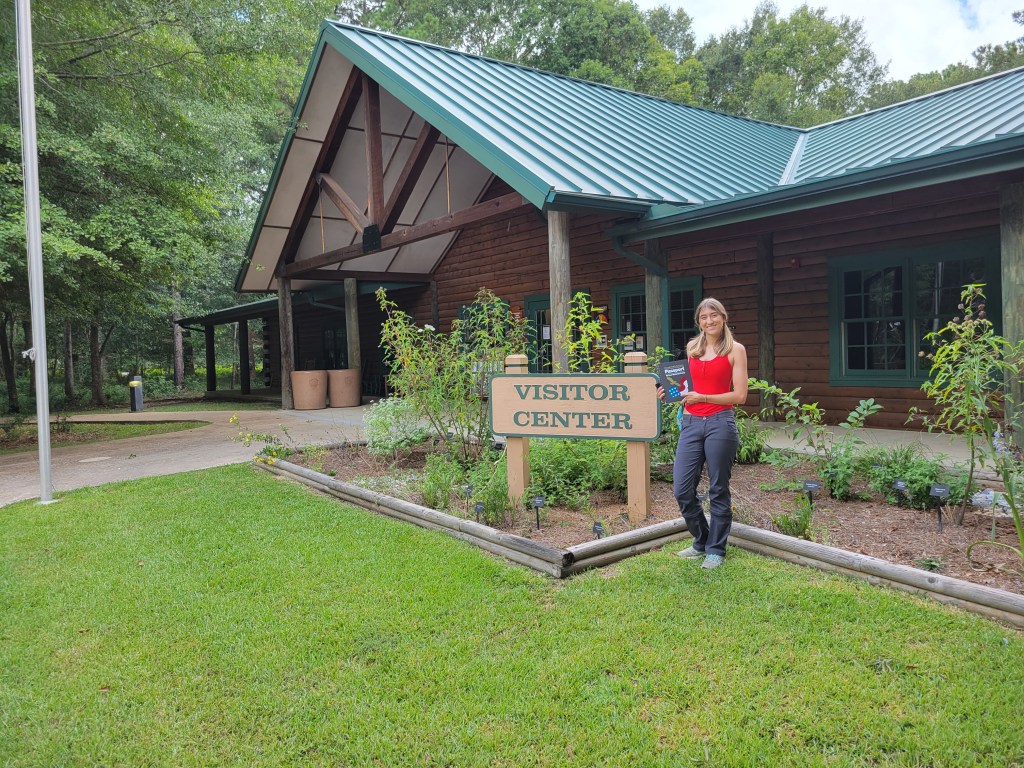
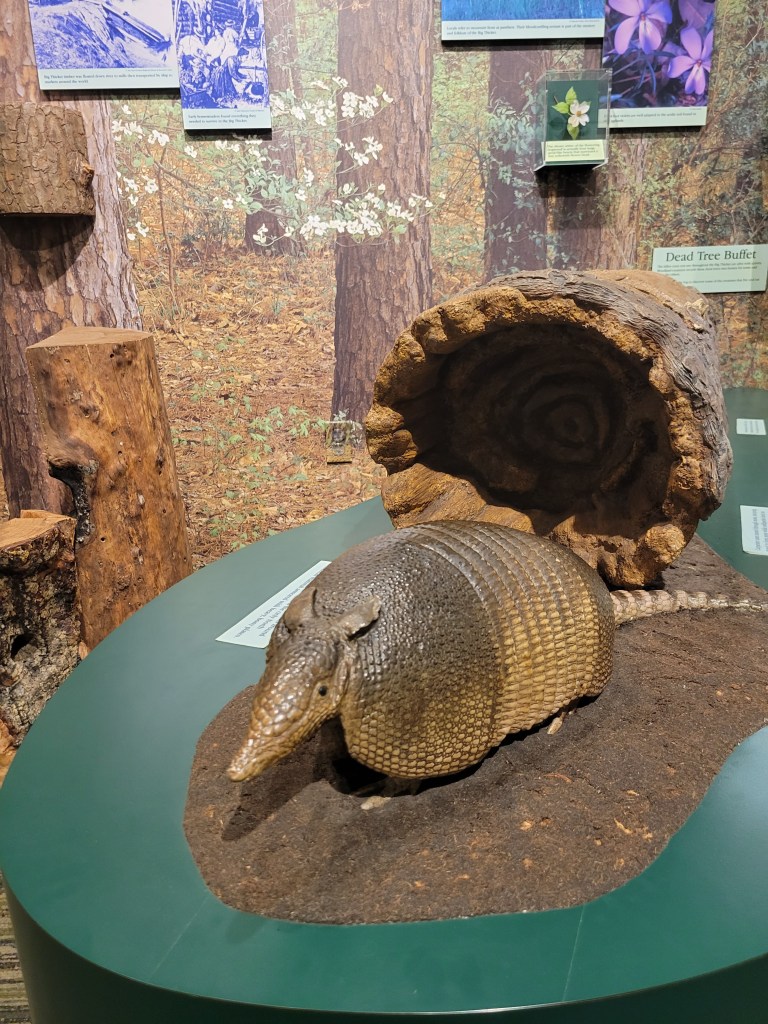
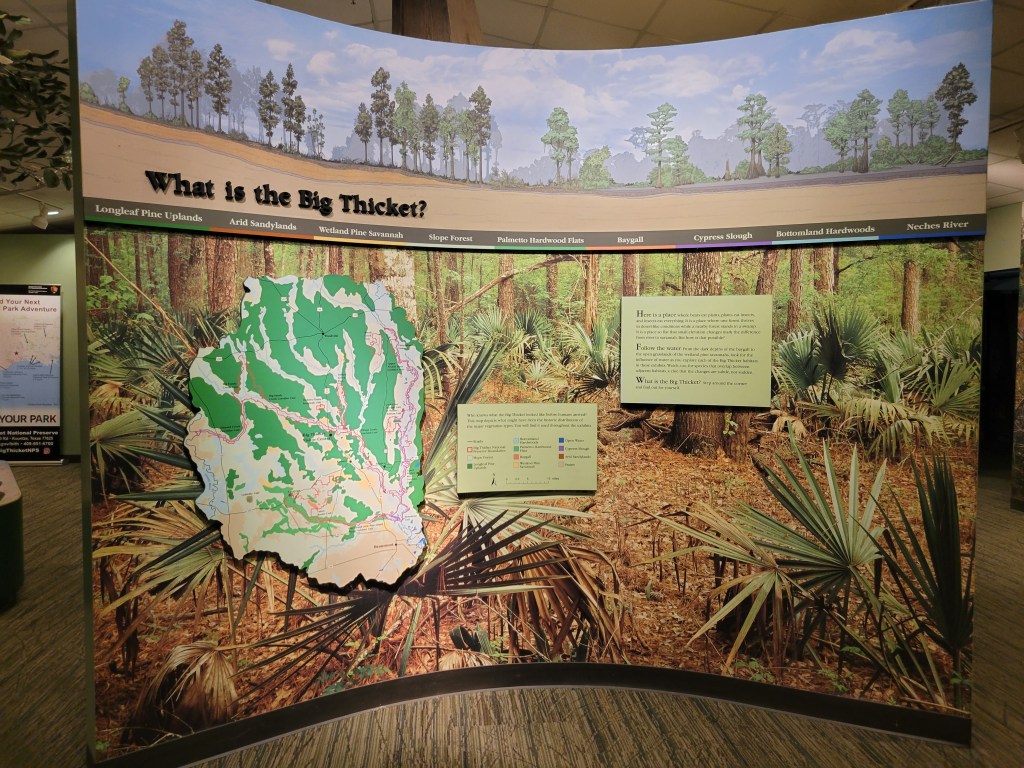
Our first stop of the day was to the Big Thicket National Preserve Visitor Center. The visitor center is located at 6102 FM 420, Kountze, TX 77625. Here we walked through the informational exhibits and went through the gift shop to get some souvenirs. This is also the place to get your cancelation stamp for your National Park book. I’m obsessed with getting all of my cancelations done in my National Park book. Each cancelation stamp has the date that you visited the park so it is a great way to keep memories of your adventures.

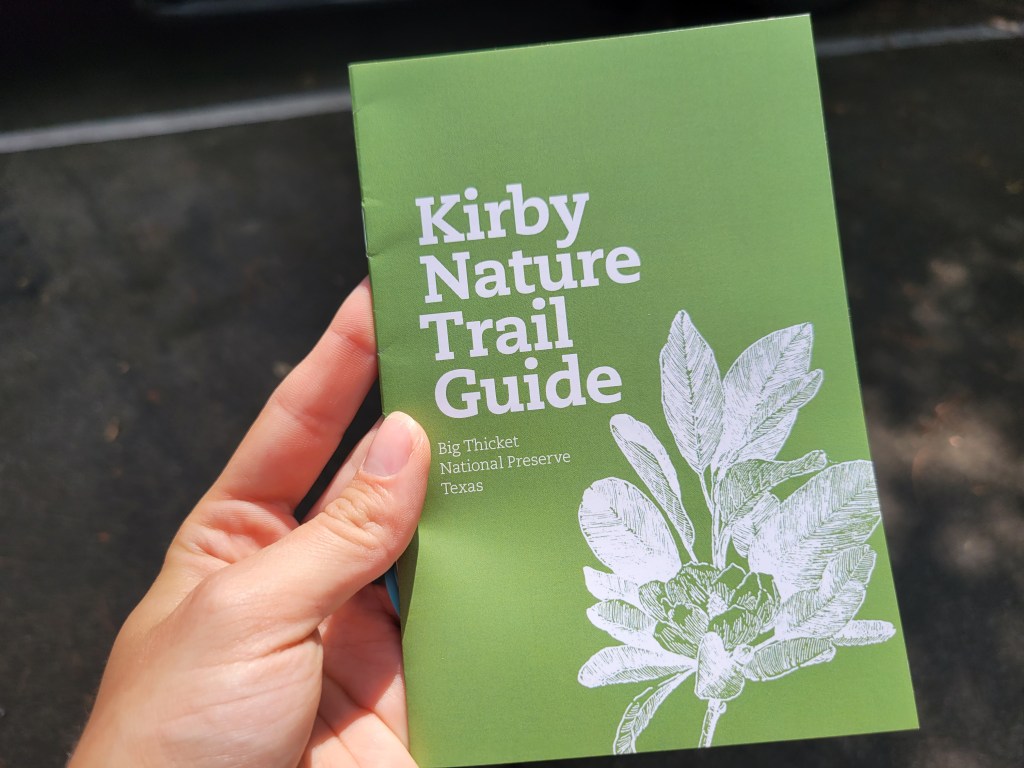
At the visitor center you can also purchase the trail guide for the Kirby Nature Trail. I always try to get these whenever they are available because they give you additional information while completing the hike that you would otherwise have missed.

Kirby Nature Trail

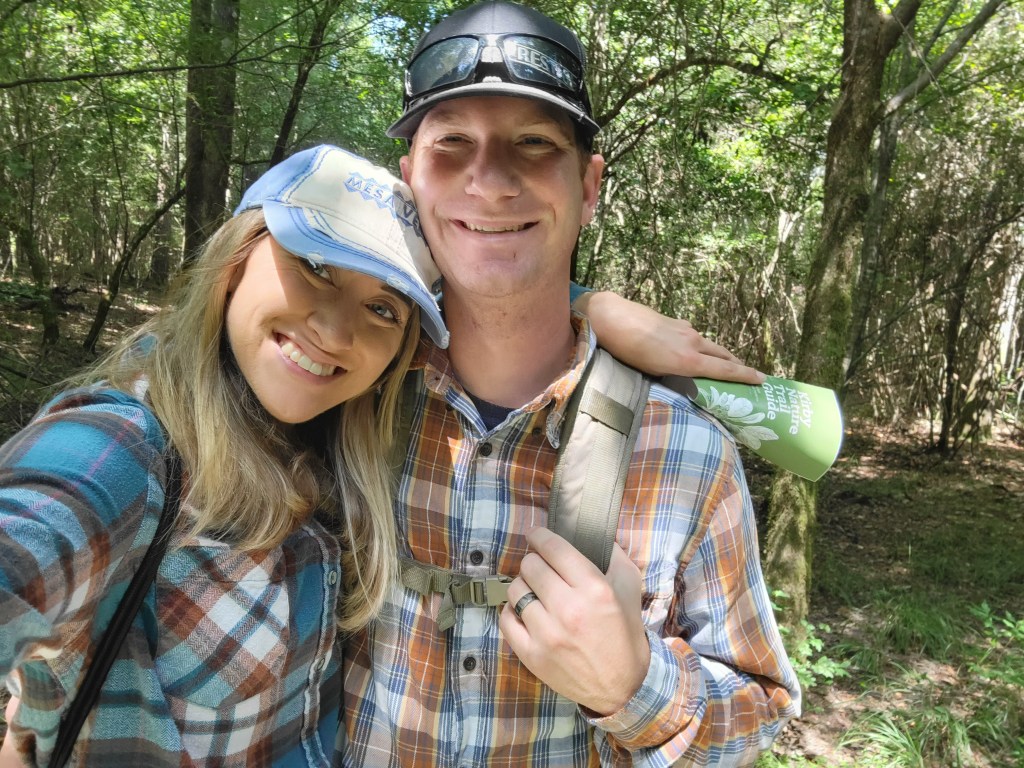
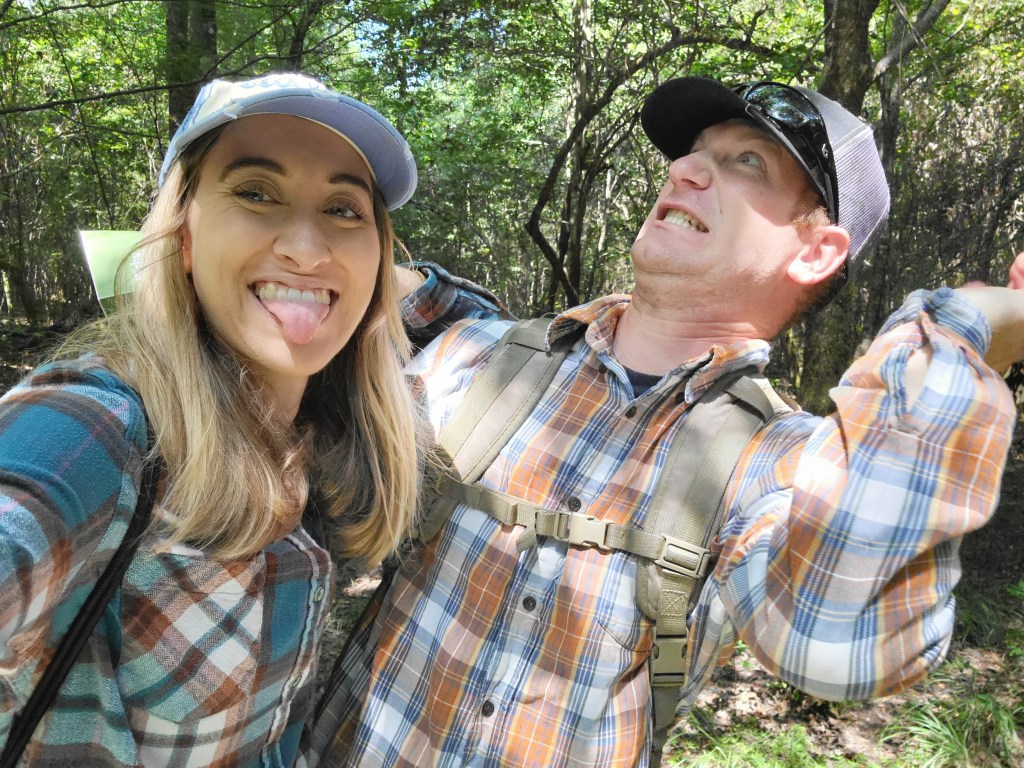
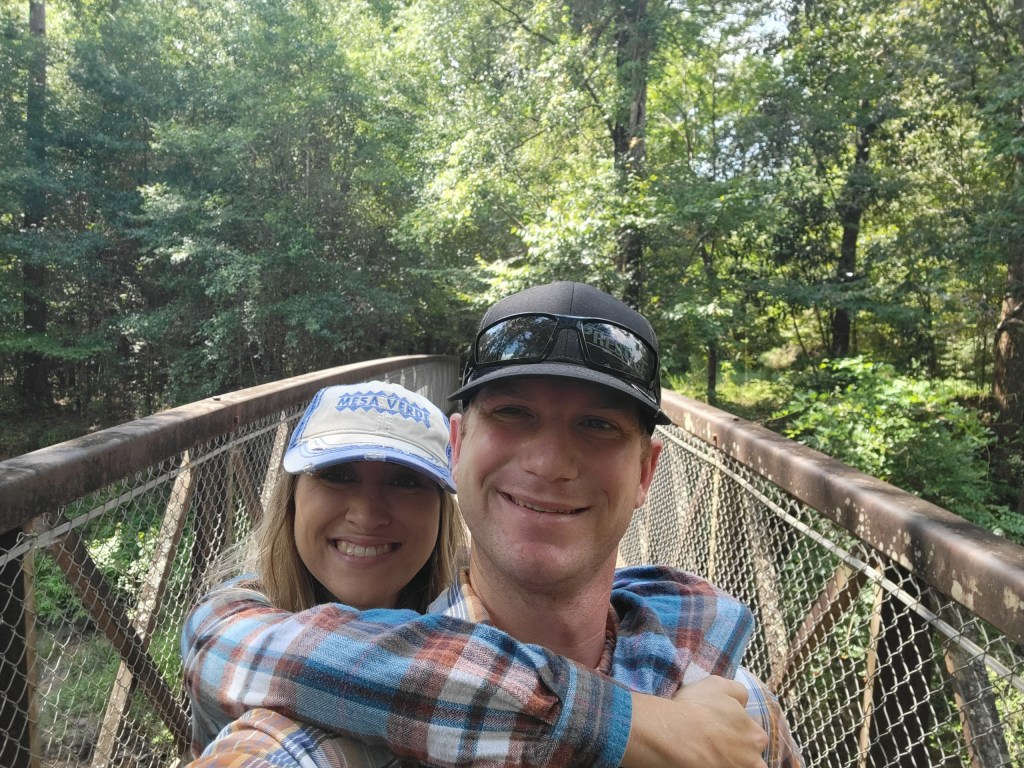
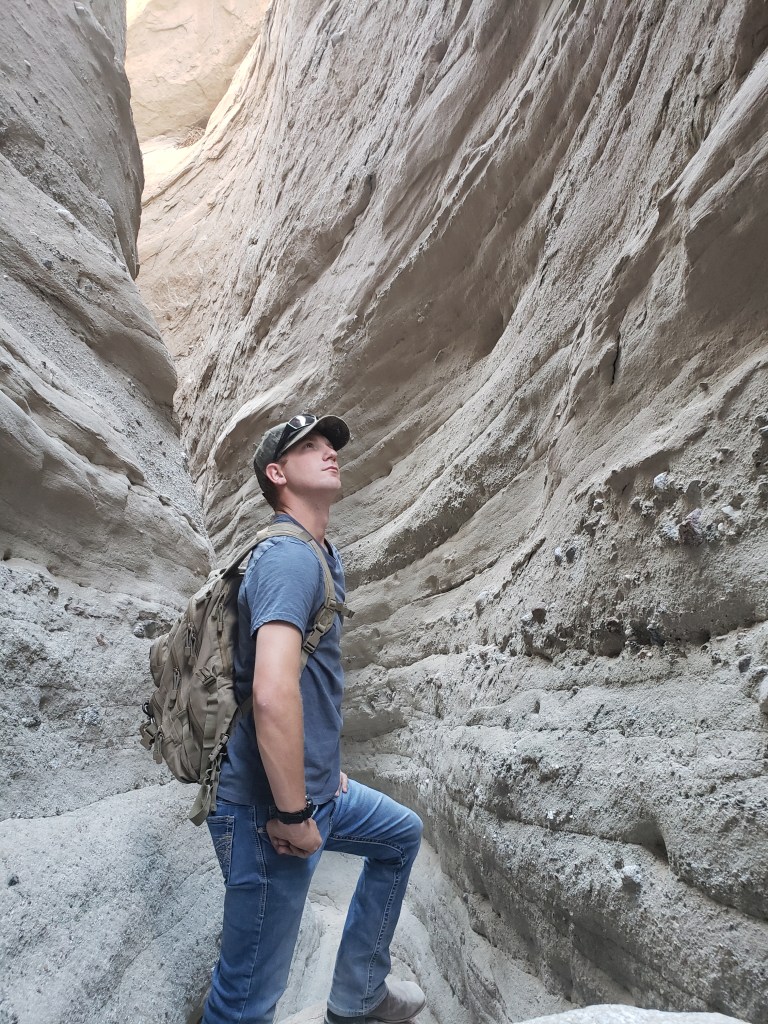
I’m not going to lie….there are a lot, and I mean A LOT of mosquitos on this trail. Brandon and I both wore pants and long sleeves to protect against the buggies as well as applying bug spray multiple times throughout the hike. And they still tried to eat us alive, yuck! As long as we were walking they did not bother us too much. However, whenever we would stop to take pictures they would swarm around our heads. So moral of the story is be prepared for the bugs. Pictured below is the lovely moment when we were trying to take a picture together and a bug flew at Brandon’s head. He does not do well with bugs, haha.

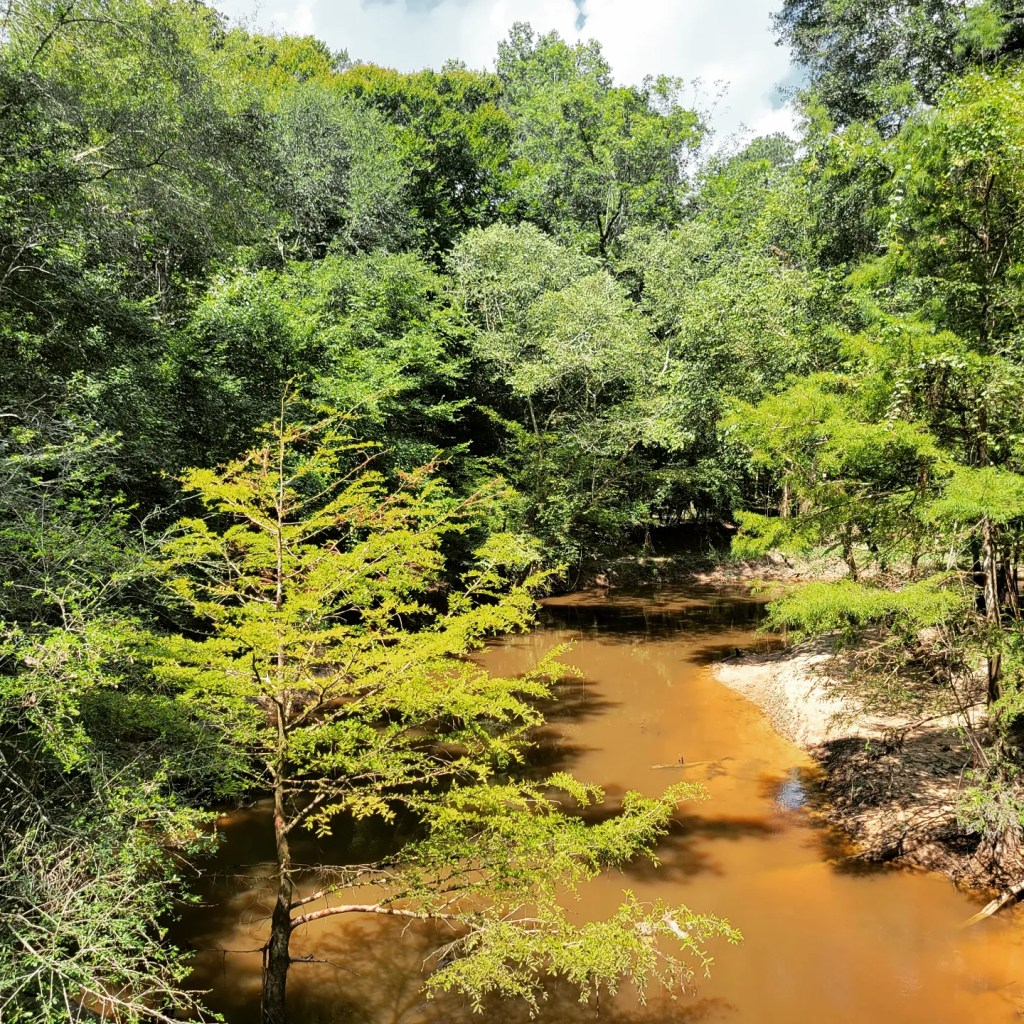
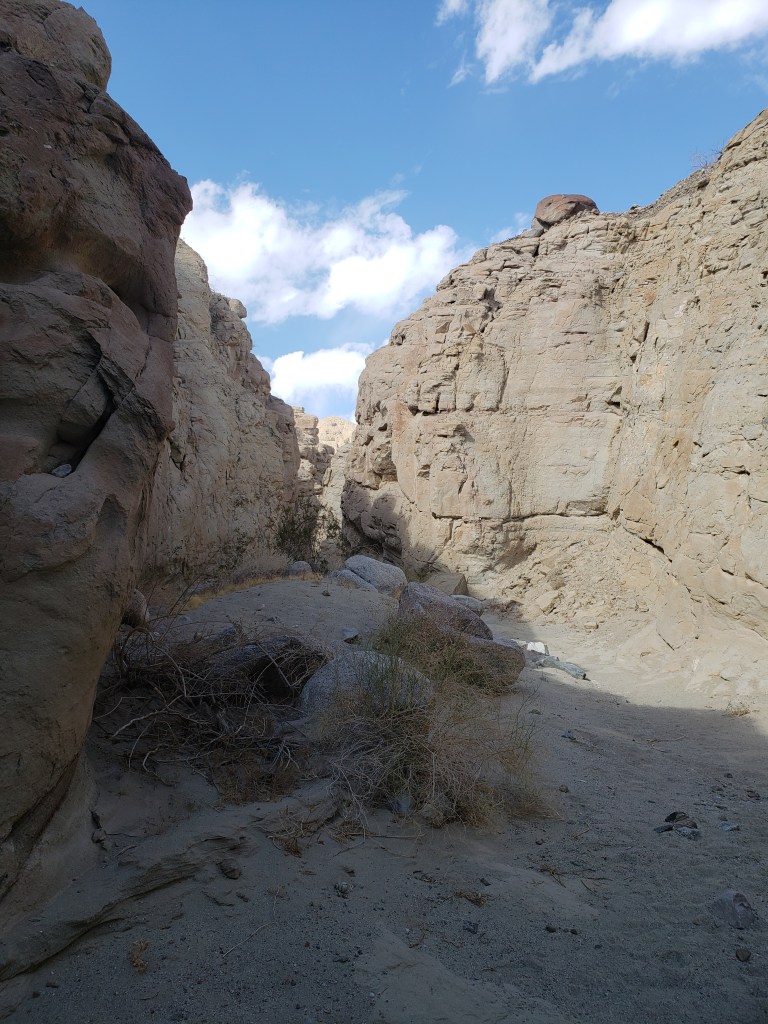
However, besides the bugs the scenery is beautiful with several swampland areas that you weave in and out of while on the trail. There are two hiking options depending on preference and fitness level. There is an inner hiking loop that is only 1.5 miles. The outer Kirby Nature Trail loop is 2.5 miles. Brandon and I opted to do the outer trail loop.

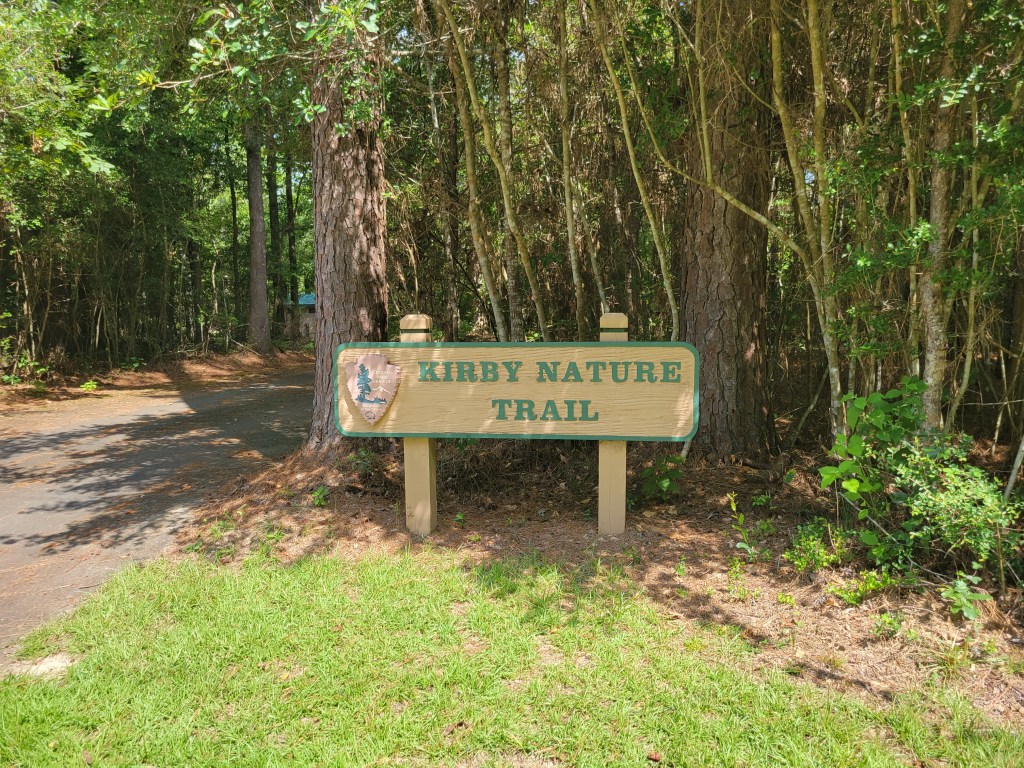
When driving to the trail head from the Visitor Center you will make a left out onto the main road that runs through the park. The the trail head and parking lot are on the left about 2.5miles down the road. Make sure you look for the sign because the turn comes up quick. Brandon and I almost missed it!

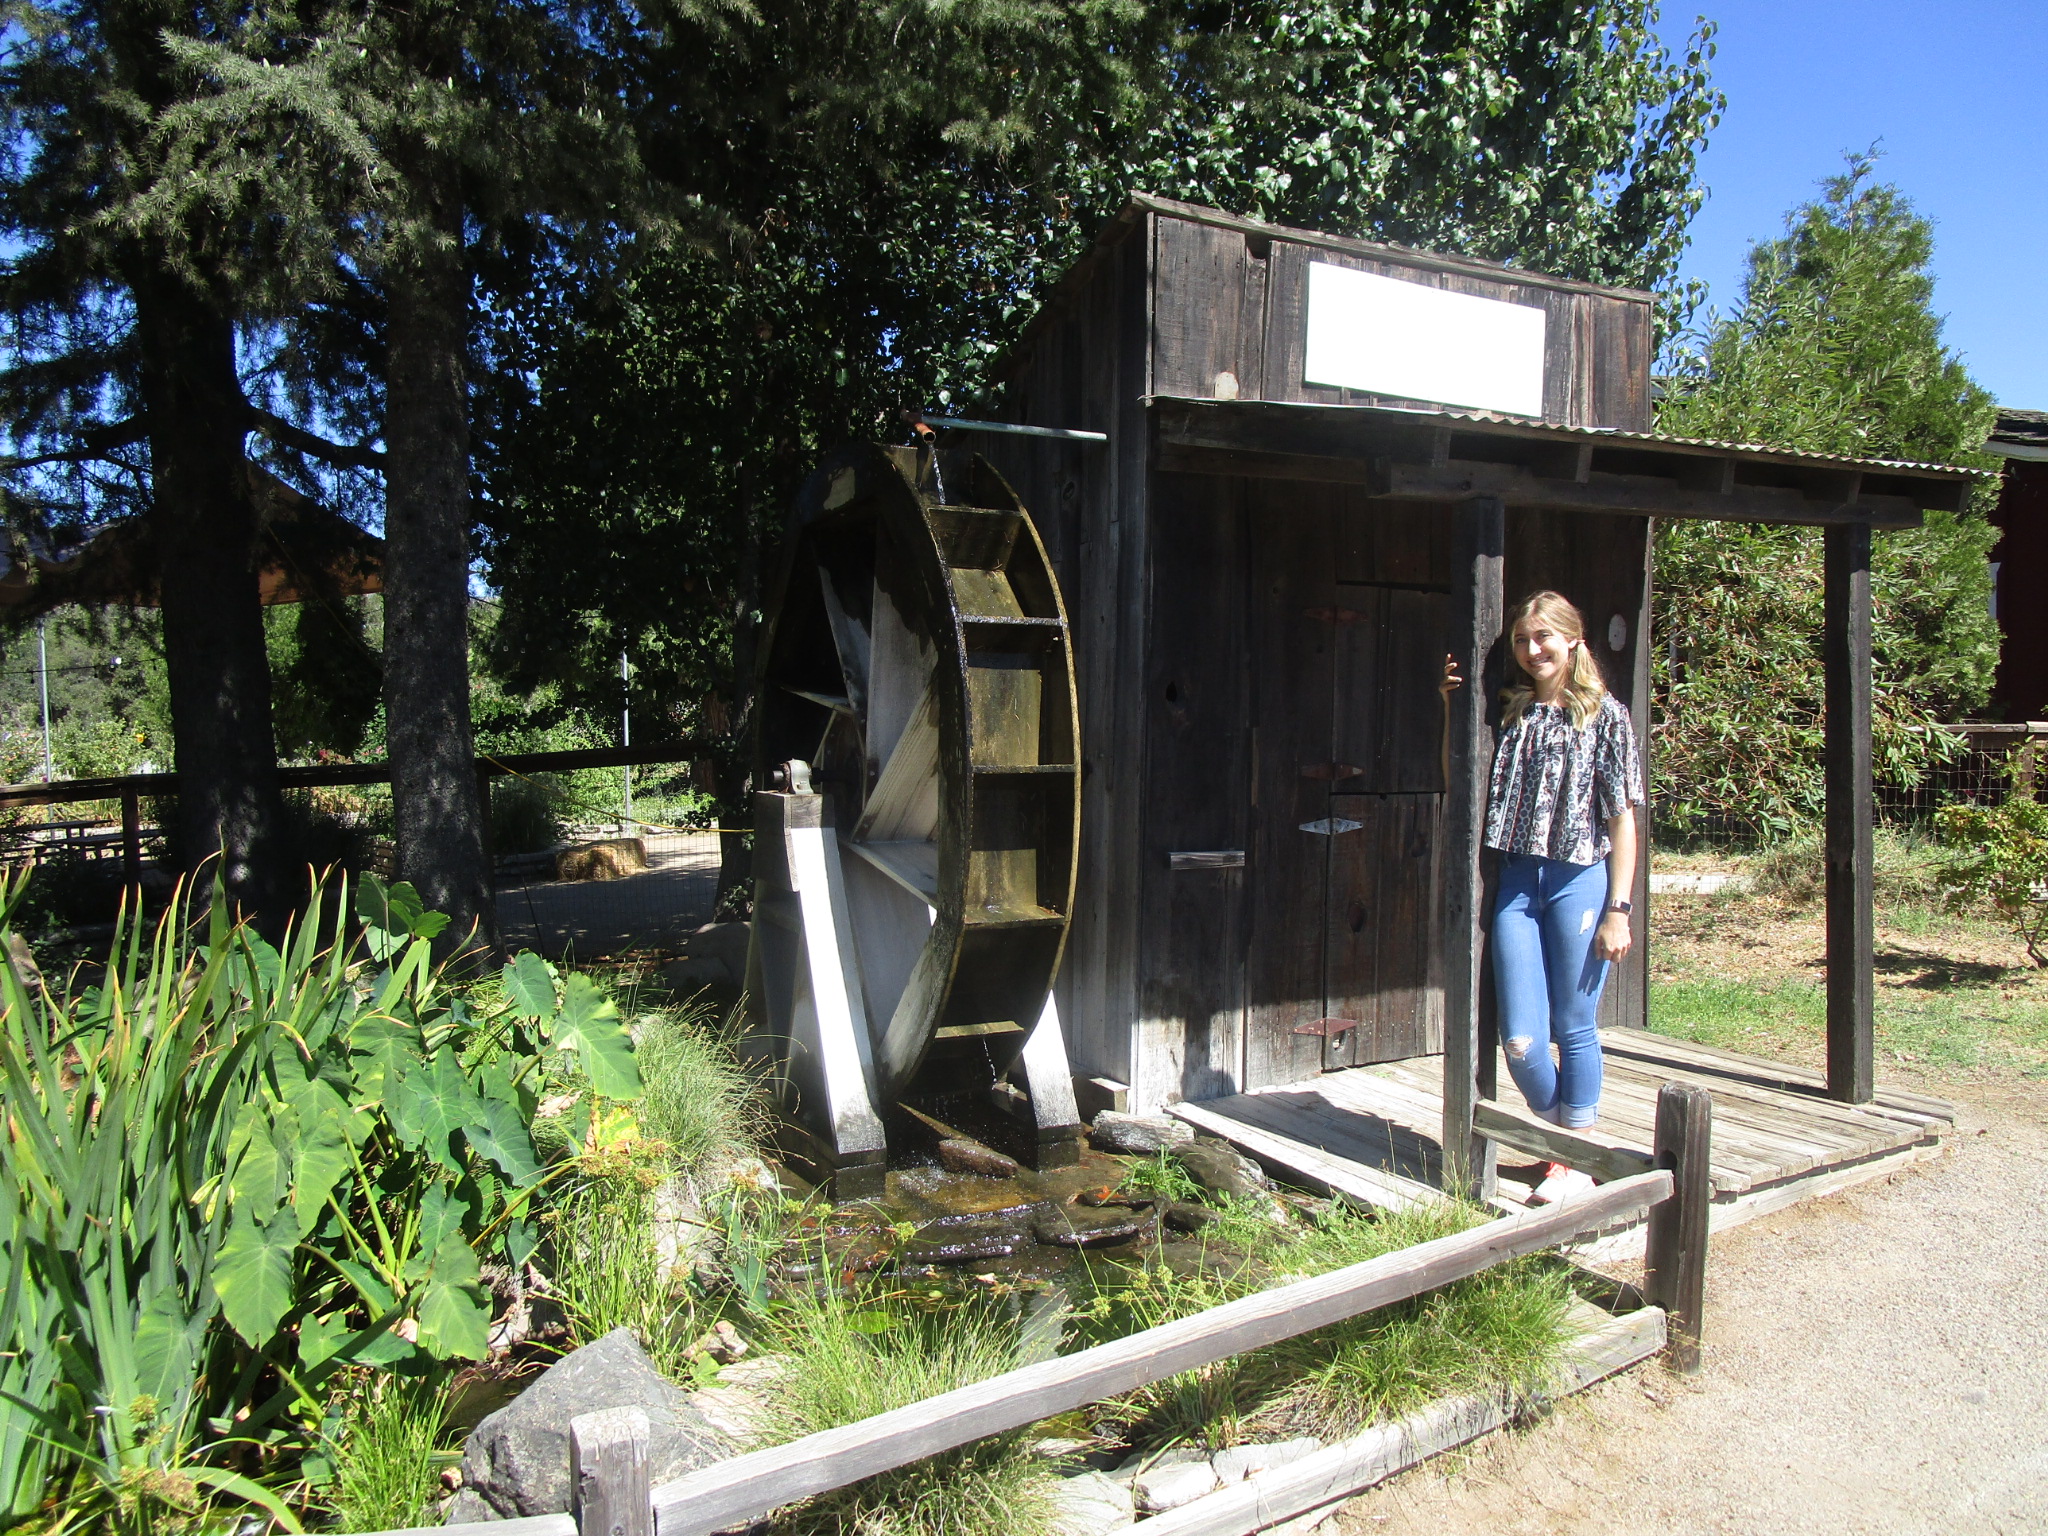
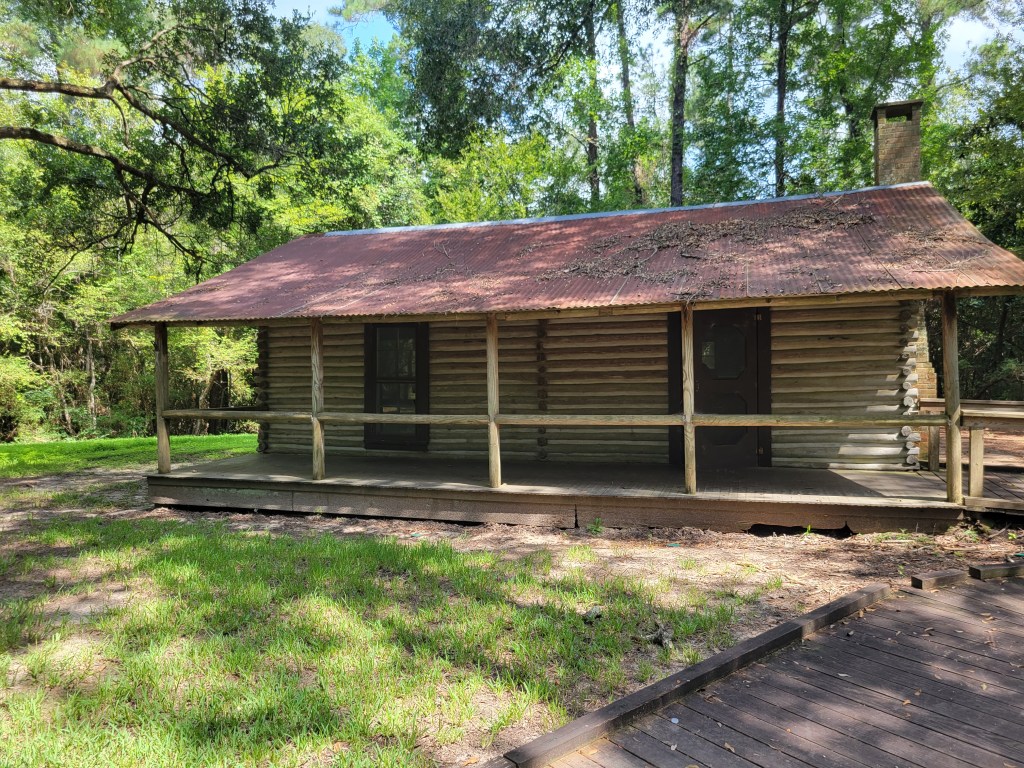
Once in the parking lot follow the signs that guide you to the start of the trail. You will pass an old log cabin on the way.

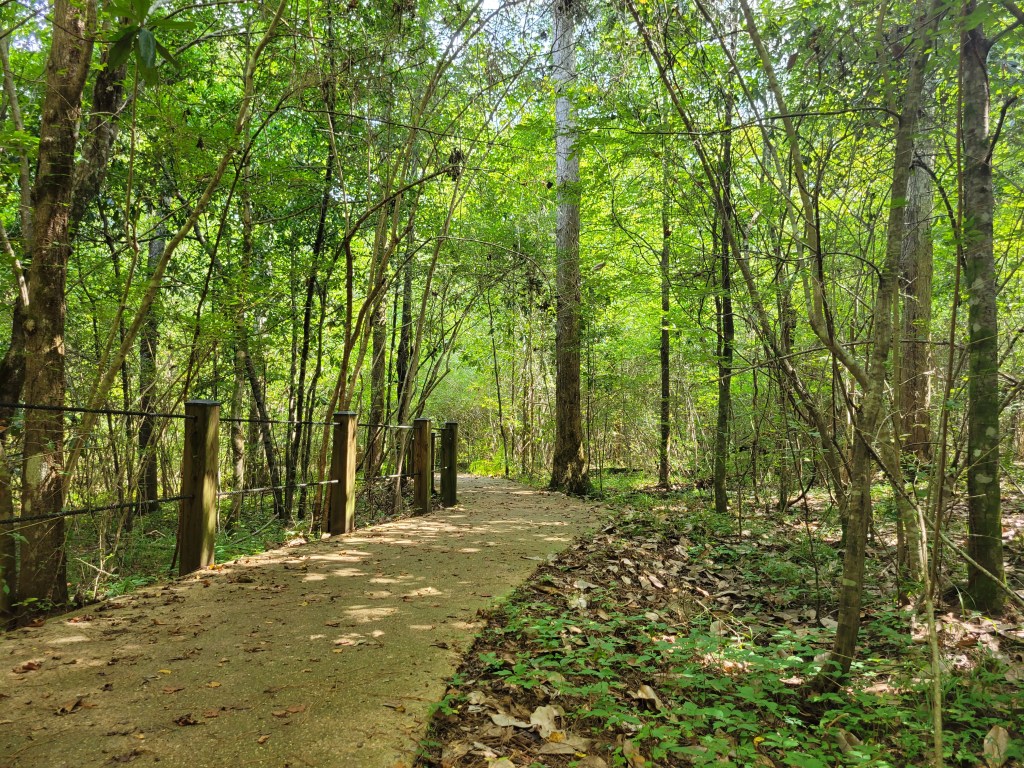
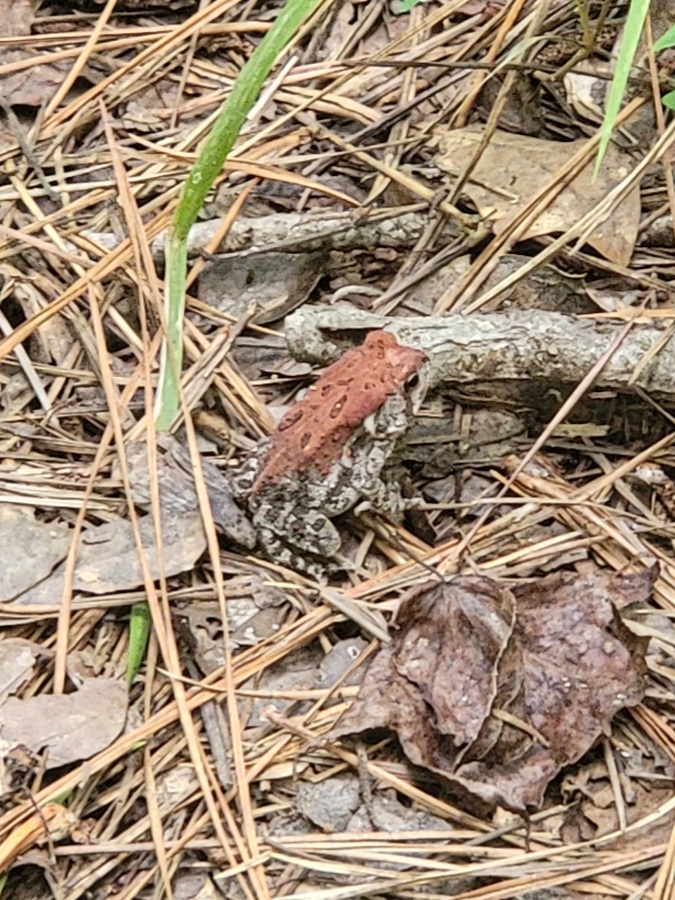
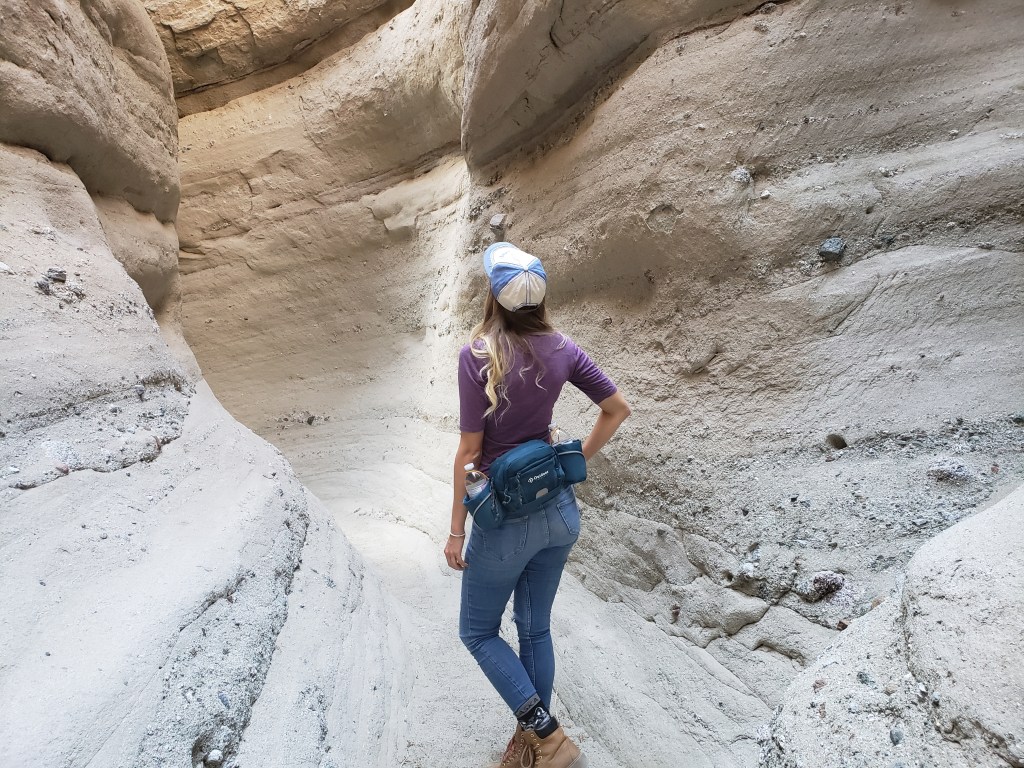
The trail itself is so beautiful! Make sure to stop at each number marker along the way and read the information that responds to it in the Kirby Nature Trail Guide. When on the trail make sure you watch where your put your feet. There were tons of baby frogs and toads dotting the trail. We even saw a tiny baby snake that was thinner then one of my fingers!

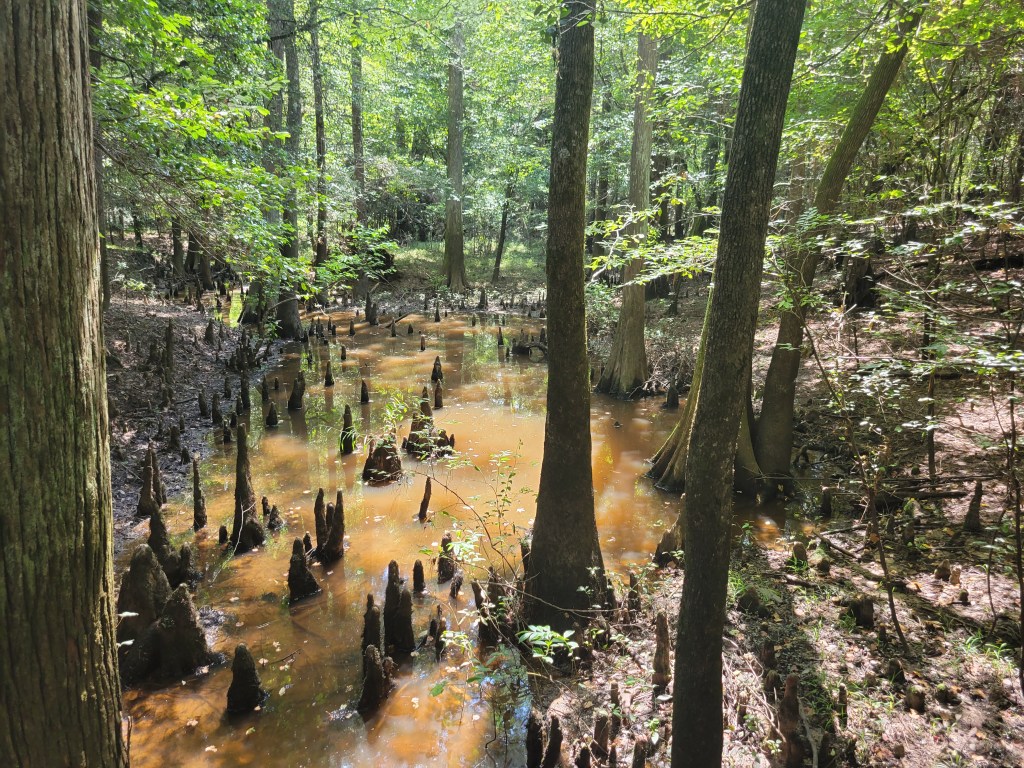
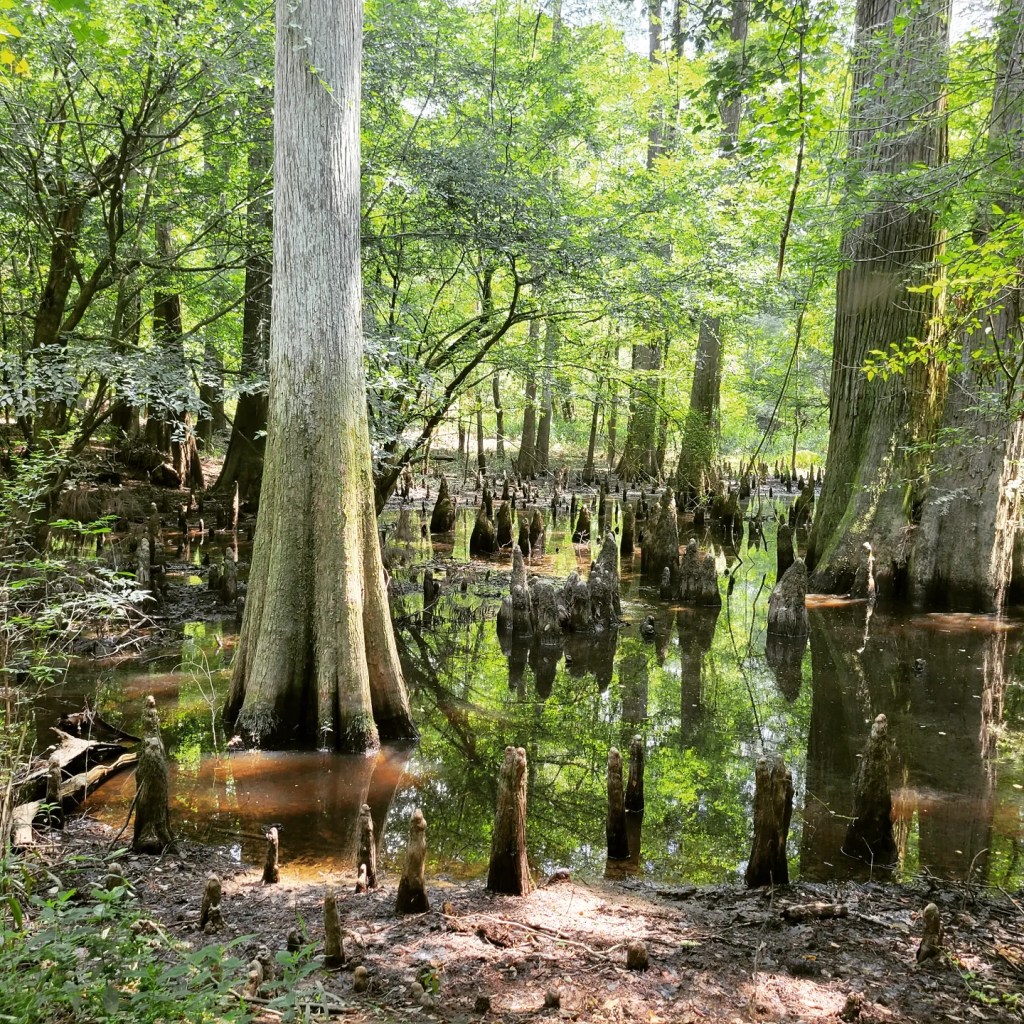
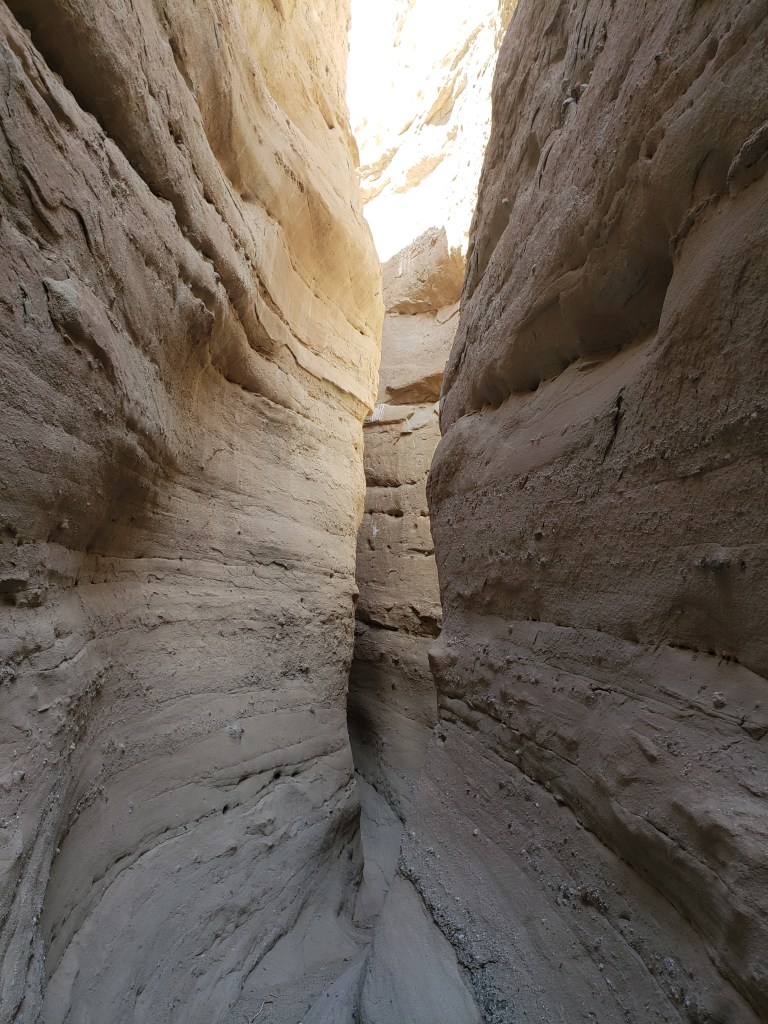
My favorite part of the hike were the swamp areas. Coming from sunny California I had never gotten to seen that kind of foliage before. I learned that these are called Cypress Sloughs. Bald Cypress Trees thrive in water filled areas and fluted trunks and knees help anchor then in the wet soil. These areas are where Alligators and Water Moccasins tend to thrive so make sure you watch out for them!

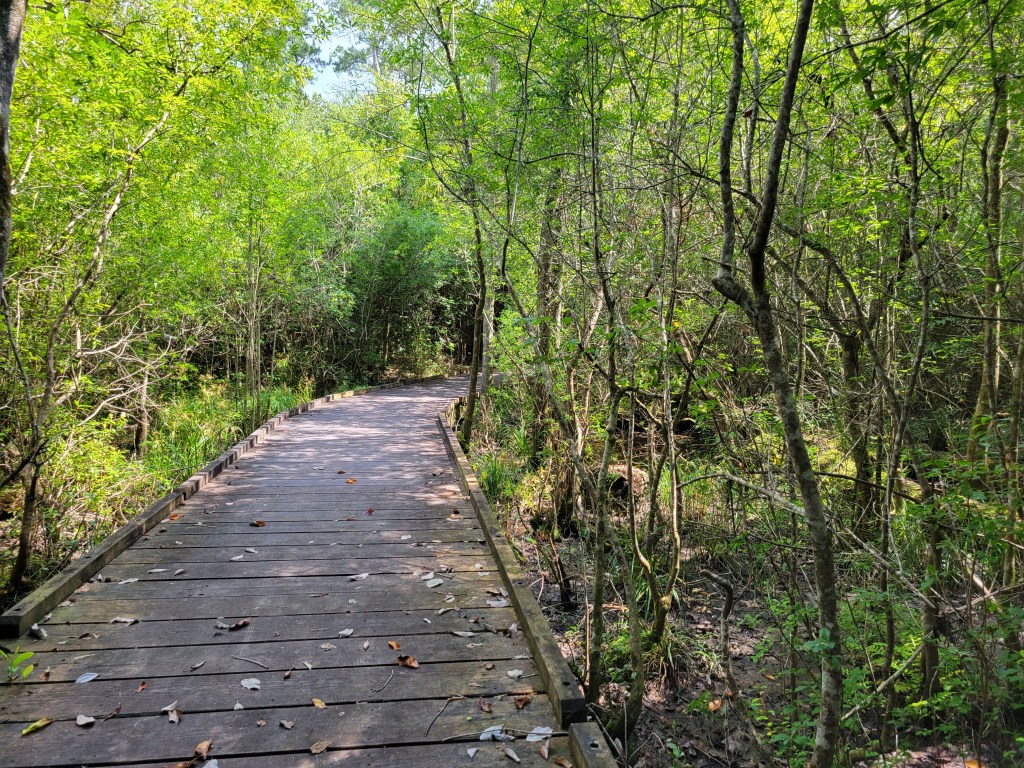
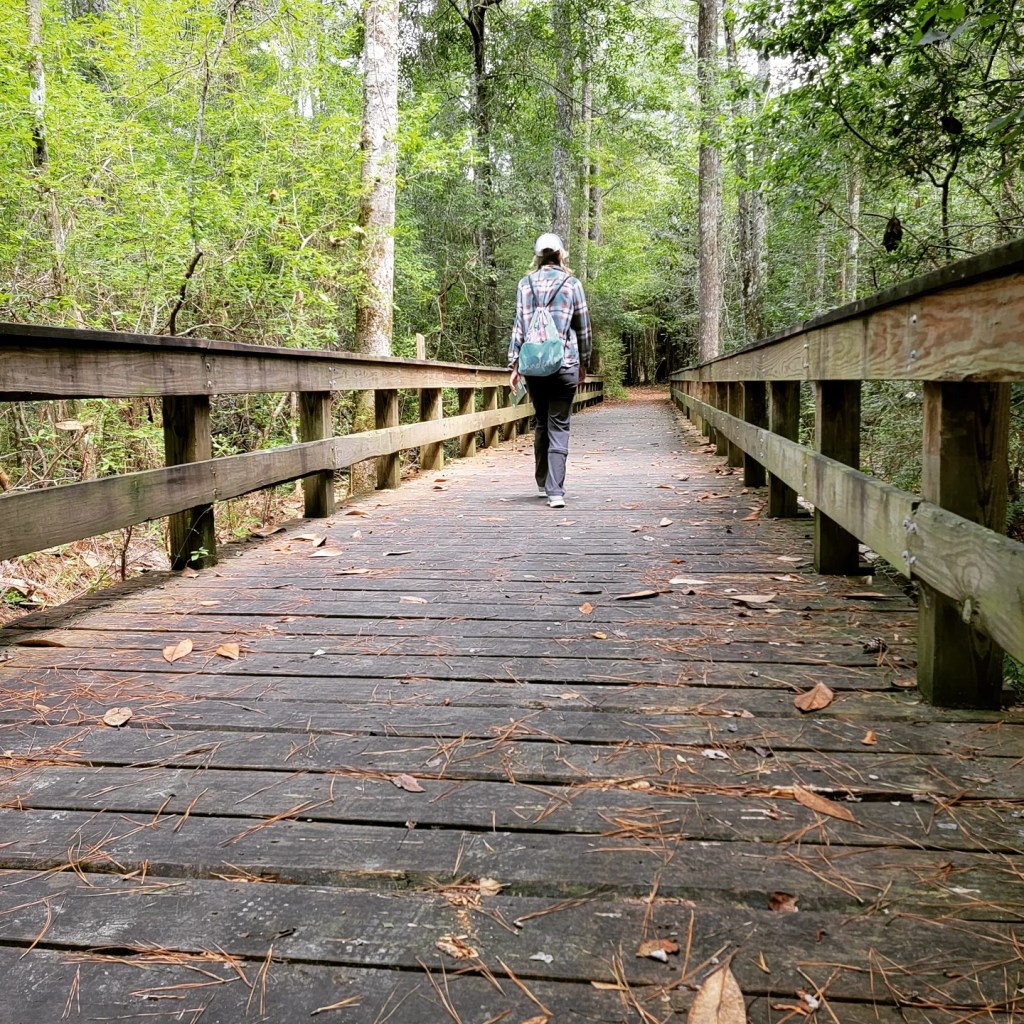
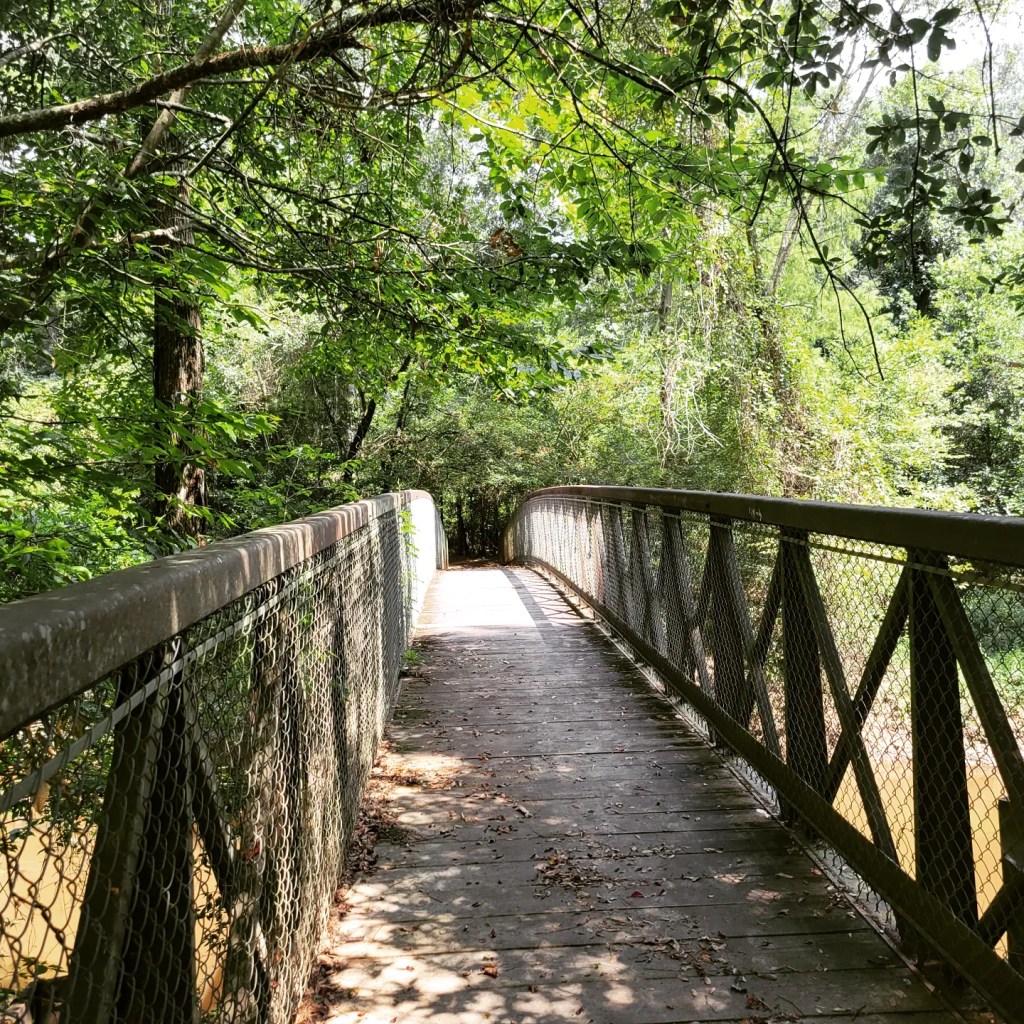
The rest of the trail loops over plank bridges and the bottomland floodplain area. This area contains lots of Hickory, Oak, Sweet Gum, and River Cane foliage. If your lucky in this area you will be able to see Green Tree Frogs!

I hope you all enjoyed this post and take the time to go explore some areas in Texas! As always stay safe and Happy Travels!

Advertisement

Mojave National Preserve- Lava Tubes

The Mojave National Preserve is a vast landscape full of Cinder Cones, Lava Flows, and Lava Tubes. The The Cinder Cones began erupting 7.6 million years ago and caused the rivers of lava flows that cross the preserve. Lava last flowed in the park only 10,000 years ago. Today the preserve is one of the best places to go hiking through lava tubes.

The road leading to the Lava Tube. You can see two Cinder Cones in the Background.

The Lava tube is accessible from a five mile drive from Kelbaker road. Be warned, this road is mostly dirt and is very bumpy. Our truck was rattling the whole way down the road. I recommend making stops along the way to take pictures of the Cinder Cones. You will also cross by one of the Lava Rivers that has since hardened into a beautiful rocky landscape. Also don’t forget to keep an eye out for Joshua Trees!

Once you arrive at the end of the dirt road you will need to park and hike the rest of the way to the Lava Tube. There is not a set parking lot for the hiking trail, just a turn around area. Please be aware that the Lava Tube is not maintained by the national park service so you are entering at your own risk.

Once you park it is a roughly 300 yard walk until you reach the branch the takes you up the the top of the Lava Tube. It is very easy to miss the turn as it is unmarked. My husband and I missed it the first time and had to double back almost half a mile. The GPS coordinates for the Lava Tubes are 35.2163, -115.7515.

When you reach the entrance you will need to climb down stairs to reach the mouth of the Lava Tube. The stairs are very steep and it feels like you are climbing down a latter. Use Caution. The entrance into the lava tube looks dauting so be sure to follow the trail as closely as possible.

Once you enter the Lava Tube you will be amazed at the spectacular view. The natural skylights of the cave ceiling illuminate the walls dramatically. It is a great photo spot for those of you that are looking for your next perfect Instagram post.

I hope you all enjoyed this post. Leave a comment in the box below and let me know what you all think!

Happy Travels!

Calcite Mine Off road trail and Slot Canyon hike

One Jeep off road trail I recommend doing if you are around the Ocotillo Wells area is the Calcite Mine Trail. This desert trail located in sunny California is full of twists and turns and has gorgeous desert views. It also has a sandy wash were you can stop for lunch and then take the slot canyon hiking trail on foot.

Be Prepared:

This trail is not for the faint hearted. There are several sections where there were deep divots that made it difficult for our jeep to transverse it.

Our 1990 Jeep Cherokee has a 3.5 inch lift kit on 31 inch tires with limited slip differentials.
With this setup, we found a few technical areas on this trail but we were able to navigate through them
successfully. For more modern vehicles, a simple leveling kit (1-3 inches) and larger tires
would be suitable to tackle this trail. As for differentials, Limited Slips are ok, but
Lockers would be preferred.

And as always make sure you go with an off road buddy so if you break down you have someone there that can help you. And on this note…make sure you bring recovery tools for safety! This includes but is not limited to tow hooks, shackles, tow straps, shovel, and spare tire and change out equipment/tools. Finally, make sure you have plenty of snacks and water. It can get very hot out there! You don’t want to run out of water or food while you are waiting for help if you break down. Be sure to check the local weather before your trip, because this is a High Risk Flash Flood Area.

Calcite Mine Trail:

The Calcite Mine Trail is right off the S22. GPS coordinates to the trail head are 33.281185, -116.096511.The trail starts as soon as you pull of the road and is marked by a sign. Some hikers will hike the off road trail to the slot canyon so make sure you are on the look out for pedestrians while on the trail.

The jeep trail is a one way road so there will be vehicles coming back from the slot canyon hike that you will need to look out for. We had to back up on the trail several times to make room for oncoming vehicles. Our first time on the trail we actually passed the slot canyon trail head by accident. We met up with a couple jeepers at a further lookout point that helped guide us back to the trailhead. There is no sign marking the trail, it is just an opening in the canyon that you walk into. There is a wash that you can park your Jeep in as you hike. Make sure not to park in deep sand and get stuck!

Slot Canyon Hike

I love to hike and this section was my favorite park of the day. The slot canyons were amazing! It was a beautiful hike and it wasn’t very long. The trail ends when the slot canyon ends (it tapers to a rock wall that you can’t transverse) then you double back. The whole hike (there and back) is probably about a mile, mile and a half.

This was the end of the trail where we turned back.

Have fun and Be Safe!

I hope you enjoy this hike and jeep trail combination. Before going make sure you are familiar with the trail and layout. Also make sure you have a safety buddy and supplies needed for towing if necessary. Please be aware that our suggestions for off road builds above are just suggestions and that unforeseen circumstances can make any rig unable to do an off road trail.

My husband and I recently moved to Texas, so if you have any jeep trails you want us to explore in the area, drop it in the comment section below:

Have Fun, be safe, and Happy Travels!

Off Roading in Ocotillo Wells- Day 1

I learned how to off road this weekend!!! This was a miracle because I’m not known as being a good driver, in fact I’m known for being the complete opposite. But that’s okay because I didn’t crash or flip the Jeep! My boyfriend has been off roading since he was a kid and wanted to share the fun of driving trails with me. We decided that Ocotillo Wells was the perfect place for me to experience my first off roading weekend.

Ocotilla Wells is a State Vehicular Recreational Area in California. The desert was originally an ocean millions of years ago and due to this there are many places you can go to see fossils and cool stone structures. The off road trails are all clearly marked with street signs and there are bathrooms throughout the park (major plus). There is also an ATV Training Track and a 4×4 Training area. It was a great place, and had lots of fun places to drive and cool things to see. I definitely recommend starting your trip at the Discovery Center.

The Discovery Center for Ocotillo Wells

There are friendly Park Rangers there who can give you maps and there is an awesome fossil display! They even had a Megalodon Tooth that was found in Ocotillo (WHaaaaaaat??? So Cool!).

Megalodon teeth at the Discovery Center

Background on our Jeep Cherokee:

Our 1990 Jeep Cherokee is a project off road car. Brandon originally bought it stock from a neighbor who is a close family friend. Since then he has added a 3 1/2 inch Rubicon Express lift kit, and upgraded to Hercules all Terrain Tires. The goal is to eventually have a 7.5 inch lift with Diana 60’s on 42 inch Tires (its okay if you don’t know what any of that means cuz I don’t know either, like I said, I’m new to off roading and all this car stuff is like a foreign language).

Sights to See:

  1. Shell Reef: Shell Reef is a five foot thick bed of fossilized rocks that is the remnant of an ancient sea shore from 4 million years ago. The fossilized reef contains oysters, clams, and scallops. Shell Reef was our first stop of the day after setting up camp. It was really cool getting to see all the fossils.
  2. Pumpkin Patch: The Pumpkin Patch was our second stop of the day. The pumpkin patch is a large group of pumpkin-sized features that are called “concretions” that are formed by loose sand cementing around a particle of sand, pebble, or shell. They looked like round boulders but it was fun getting to see them all together.

Off Road Trails:

  1. Cross Over Trail (Moderate Difficulty)- Narrow at points while traversing terrain.
  2. Freedom Trail (Easy Difficulty)- Sandy in spots, primarily hard packed trail with hilly terrain.
  3. Tule Wash (Easy Difficulty)- Sandy, rocky and windey terrain.

Our Campsite:

We ended up camping off County Line Road. The nice thing is that in most of the park you can pull off any trail/road and camp where ever you want. Just be careful where you park so that your vehicle doesn’t get stuck. (That wouldn’t be a fun start to your weekend.)

Our first day at Ocotillo Wells was so much fun! It was fun getting to see all of the cool rock formations and learn how to drive in washes. Check out my next article Off Roading in Ocotillo Wells Day 2 to learn more about the off roading trails in Ocotillo. Thanks for reading and Happy Travels!

Hiking Cliff Side at Torrey Pines

If you love the beach and warm weather then San Diego is the place for you. San Diego has many attractions including Old Town San Diego, the Harbor, Balboa Park, and the world famous San Diego Zoo. However, what many people don’t know is that there are many beautiful hiking spots in and around San Diego. One of my favorite hikes is in Torrey Pines.

Torry Pines is a state national reserve that includes a beach and dramatic seaside cliffs. To learn more about the reserve, and the current events happening there please visit: https://torreypine.org/. 

Hikers can drive to the visitor center at the Torrey Pines Lodge at the top of the mountain to park, or they can park at the sea side parking lot. Parking fees depend on the season and the time of week that you visit the reserve. Prices range between 12- 20 dollars per vehicle. Please visit the website to find exact pricing for when you visit.

There are many small intertwining trails that one can take, and depending on your preference the trails can be combined to create a loop that hikes down the cliffs and onto the seashore, then continues along the shore until you reach the sea side parking lot and from there you can walk up the mountain alongside the road. This will take you back to the parking lot located at the Torrey Pines Lodge  and Visitor Center.

The Beach Hike

For our hike we started at the trail head labeled “Beach Trail, Razor Point, Red Butte, and Yucca Point”.

We continued walking along this trail until we reached a left hand turn for “Beach, Flat Rock”.

You will follow this trail all the way to the beach. The trail is well maintained and has a nice sandy pathway. Be warned that there can be rattle snakes and that you will see many signs cautioning you to stay on the path to prevent running into one. We went hiking in the mid afternoon and the lighting was perfect for pictures!

After following the trail for awhile you will come to a stair case that will lead you directly onto the beach.

The beach has large pebbles and rocks of a variety of colors. If you go at low tide you can find many of these rocks while walking along the beach. Low and high tide times are on the Torrey Pines National Reserve Website listed earlier in the article. 

After walking along the beach we headed back to the staircase that led back to the hiking trails  located in the cliffs.

As mentioned before some hikers opt to hike the beach all the way back to the beach parking lot and hike up alongside the road instead.We opted to hike back the way we had come so that we could go to each of the look out points located among the cliffs. First we went to “Razor Point Overlook”. Then we went to “Yucca Point”. Yucca Point had the most beautiful views of the cliffs and oceans and this is where I took most of my pictures.

This beautiful tree was located on the trail head leading to Yucca Lookout Point.

We ended by going to “Red Butte”. This was a popular lookout point because it is very close to the parking lot at Torrey Pines Lodge. It was also very crowded and had similar views to the Yucca Point lookout.

Overall the hike was not very long and took us approximately 2 hours. This included stopping frequently to take pictures and taking a break at the beach to watch the waves. There are a lot of people who take the hiking trails so if you are looking for a quiet hike to get away from the city this might not be the trail for you. However, the views are spectacular and I believe it is a great place to get away and take some amazing pictures!

I hope this blog post was helpful, and if you have any questions about the trails feel free to comment below. Happy Travels!

***Disclaimer: I am not responsible for content on external websites listed on this blog post.

Dreaming in Lucerne, Switzerland

Switzerland brought with it a variety of adventures. While in Switzerland I saw snow topped mountains, cute, colorful buildings, and got to go on a boat ride on Lake Lucerne. Everywhere I went the scenery was gorgeous! I couldn’t stop taking pictures (which is why this post has a ton of pictures in it!). If you love nature photography this is the place to go.

So before I tell you about all the fun stuff, here are some fun facts about Switzerland.  German is the main language spoken but citizens also speak French, Italian, and English. Switzerland has its own currency, the swiss frank. Some shops do accept euros but they will give you change in swiss franks. Another thing to know before going to Switzerland is that it is an expensive country to travel to. Food, hotels, and attractions are all pricey so make sure you have plenty of travel money set aside before going here. Finally, the most important thing…..Switzerland has amazing chocolate! There is even a chocolate museum in Lucerne.

The Lion Monument (German: Löwendenkmal):

20180404_175255

The Lion Monument or also known as the Lion of Lucerne was built to commemorate the Swiss guards that were massacred in 1792 in the French Revolution. The sculpture is very intricate and the expression on the lions face is touching in its sad, mournful quality. The monument is located at Denkmalstrasse 4, 6002 Luzern, Switzerland.

Pilatus Mountain Top

To get to the top of the mountain you need to take a cable car. The cable car varies in price depending on what stop you get off at and what time of year it is.  We went to the second stop which has a nice gift shop, small cafe, hotel, and viewing areas of the mountain. It was snowing very hard when we arrived but the snow cleared long enough for us to get out on the viewing platform to take pictures. I was told by the guest information booth that if you visit in the summer you can see the whole mountain and go on the walking path. I would love to come back and do that.

Lunch at the Stadtkeller

For lunch we went to the Stadtkeller, and had a spectacular fondue lunch. We had cheese fondue, a main entree, and then a chocolate fondue dessert. The restaurant was cute with lots of authentic decorations.

Lake Cruise with Charles Bucher

Lake Lucerne has a small boat harbor where several harbor cruise services are available. The boat ride we took lasted one hour and 15 min. The time flew by and I felt like we were turning back when we had barely gotten started. I would have loved to have spent several hours out on the water looking at all of the surrounding scenery.  The tour company was very nice and friendly and even let me wear the captains hat and drive the boat. And luckily I didn’t run the boat into anything (thank goodness).

20180405_152516

Chocolate at Au Cahet

20180405_170132

The chocolate truffles I bought at this shop were delicious. I was impressed by the variety of flavors available and the prices were reasonable. The street that this shop is on is lined with watch shops, swiss army knife shops, and other cafes that were fun to visit.

Chapel Bridge (Kapellbrücke)

The chapel bridge spans diagonally across the Reuss in the middle of Lucerne. It is a great place to get pictures of the cute buildings spanning either side of the Reuss.

I hope you enjoyed reading this article and that you learned about some of the fun things to see and do in Lucerne, Switzerland. If you have any questions about my travels feel free to comment below. Happy Travels.

20180406_071419

Traveling in Europe-Tips and Tricks to Surviving your first time Over-Seas

Okay, lets face it. Traveling can be scary, nerve-wracking, or just down right stressful. The first time I went to Europe I was so worried I would lose my passport and be stuck in a foreign country. This was especially worrisome for me because… 1. I was traveling alone and 2. I tend to lose everything. And I seriously mean everything. But after a lot of trial and error ( and lot of stress chocolate) I have learned how to successfully travel to Europe without all the stress and worry.  Hopefully reading this article will help equip you with the skills and knowledge needed to navigate a trip to Europe.  So lets get started!

Before Traveling

  1. Get some Cash Out! Before traveling I recommend going to your local bank at home to obtain the currency of the country you are going to. Make sure you plan ahead when doing this because sometimes the bank with need a couple of days to mail in your needed amount of currency. It is important to have some cash on hand when you arrive. You can use this to pay for a taxi or whatever transportation service you are using to get to your accommodation. There are usually ATM’s or Cash Exchange Services at the airport but they often times charge huge amounts to exchange your currency. Avoid the huge fees by coming prepared with cash already in hand. Also, make sure to hide some cash is a secret place. Pick-pockets are very bad in Europe and you will need to have some cash handy if your wallet is stolen.
  2. Buy credit card and Passport sleeve protectors! Credit Card CoversAs mentioned before pick-pockets are bad in Europe. However with advances in technology comes advances in preventing pick-pocketers. To prevent people from scanning your credit card or passport information as they walk by you can purchase sleeve covers. I have one for all of my credit cards and one for my passport. I bought mine on amazon:)
  3. Outlet Converters– Make sure you have a power outlet converter that meets the standards of the country you are traveling to. This is extremely important because without it you will not be able to charge your phones, laptops, ipads (you get the picture). It is also super important for other electronic products such as hair curlers or straighteners. There are several different options and you can usually find these a stores such as Walmart or Target.

Flying in Europe

  1. Liquid containers for carry-on Bags. Quart sized BaggieThere are many important things to know when flying in Europe. First, they have a very strict liquids allotment for carry on bags! You are only allowed to have a quart-sized bag of liquids in your carry on. They will throw away anything that doesn’t fit in the quart sized bag (I have seen this happen and they do not care if it is expensive products). Another thing I was surprised about is what they consider a liquid. Lip gloss, foundation and even chap stick are all considered a liquid. I had my bag pulled aside and checked because I didn’t have my chap stick and lip stick with my liquids. Luckily I had enough room in my bag to fit these products but I have seen other fliers who had to throw away some of their belongings. This is very sad and don’t let it happen to you!

Arriving in Europe

  1. You have to pay for most public restrooms. This was a very foreign concept for me being from the United states where public restrooms are free. This is not the case in Europe. Most bathrooms, including those in train stations and bus stations require money to enter. Also, many of these money machines only except exact change. I always try to keep  2 -3 Euros in coin change when traveling.

2. Pick Pockets! Pick pockets are prevalent in most major cities in Europe. Some tips to avoid getting your belongings stolen are as follows: If wearing a backpack in heavily congested tourist areas switch it around so that it is facing forward. This might look funny but it helps you keep an eye on your things and helps prevent pickpockets from slashing the bag open with a knife. This has happened to several of my friends, don’t let it happen to you! You can purchase clothing with hidden pockets. I have a scarf that has a hidden zipper pocket. Another tactic is to wear purses across you body instead of just hanging on your shoulder. The best thing is to always be aware of your surroundings!

I hope these tips will help you be prepared to travel overseas. I will have more articles coming with more tips and tricks. Stay safe and happy travels!


Joshua Tree National Park


What do you get when you mix deserts, giant boulders, and thunderstorms? An unexpectedly adventurous trip to Joshua Tree National Park! Needless to say there were some exciting events on my trip to the park that made it a weekend I will never forget.

First, finding an open campsite was very difficult. If you want to camp at Joshua Tree during the Fall, Winter, or Spring on the weekend you need to reserve a campsite, often weeks, if not months in advanced. I was lucky to get a canceled reservation at the Cottonwood Campgrounds at the south end of the Park. I was only able to get a one-night reservation. Getting a two-night reservation at the park on the weekend is extremely difficult to do last minute so if you are planning a spontaneous trip to Joshua Tree then try to go during the week when the park is less crowded.

Okay to give you the lay of the land so to speak…most of the main campsites are at the north end of the park where the Joshua Tree Forest is. The south end of the park does not have Joshua Trees. So, plan ahead on which attractions you want to see before going to the park. I highly recommend checking out the Joshua Tree National Park website to view a list of campsites and sites to see before heading to the park: https://www.nps.gov/jotr/index.htm.

Cottonwood Campground

The Cotton Wood Campground was very nicely set up with fire pits and picnic tables at every campsite. There were also flush toilets and well water available. Overall, I was impressed by how clean and organized everything was. Also, at our campsite there was a little Kangaroo Rat I named Fluffy. If you have never seen a Kangaroo Rat, they are the cutest things ever! Google it! The campground was also conveniently placed next to the Cottonwood Visitor Center for the park. Here there is a gift shop. Park rangers are also available to talk to about hiking and nature viewing options. This is also the place you can get the cancellations for your national park passports…if you have not started doing this I highly recommend it!

The passport books allow you to get a cancellation (or stamp as I like to call them). Every park has a cancellation and sticker that you can collect. The parks sell small and large collectible passports that you can put the cancellations and stamps in. It is so much fun, and admittedly I am addicted to trying to get as many cancellations as I can😊.

Mastodon Peak Hike

The Mastodon Peak Hike leaves out of Cottonwood Campground A. This hike was a 2.4 mile loop that took roughly an hour and a half. The trail was nicely maintained and had lots of signs to keep you going in the right direction (this is especially important to me because I tend to get very lost very easily). The trail is mostly through a dry riverbed and consists of very deep sand footing. You will get a great leg work out! The rock formations were spectacular and there were several signs to designate the different plants and flora on the trail.

The trail takes you to the Mastodon abandoned mine that is located beneath Mastodon Peak. The 0.1 mile detour hike to the top of Mastodon Peak is an unmaintained trail and included climbing over large boulders to reach the top. Use caution if climbing to the peak. The view from the top was spectacular and you could even see the Salton Sea in the distance (the title photo was taken from the lookout point).

On the way back you pass the Cottonwood Spring. You cant see the water directly but there are several large palm trees in the area that were very impressive. There is a trail head directly from the springs to the campground. You can use this to walk to the springs from the campground if don’t want to walk the whole trail. The Mastodon Peak trail itself is a full loop.

The Storm

Our one and only night at the park was very eventful. The night started out clear and by 9pm you could see the whole milky way. One of the reasons I came to the park was to see the stars and I was not disappointed. However, at roughly 12am a huge thunderstorm hit. Within an hour a flash flood roared through our campsite and washed away most of our stuff. Luckily, we were staying in a converted camper in the back of my boyfriend’s truck but other campers in our campground were not as lucky. Some people were washed away in their tents! No one was harmed and the people who were washed out of there tents were able to take shelter in the bathrooms of the campground. Firetrucks came to check on us at roughly 2am.  By morning the whole campground and park had been destroyed. We had planned to drive up to the northern end of the park to see the Joshua Trees but all the roads in the park had been washed out and the park was closed. Luckily we had a truck and were able to make it out but we had to avoid giant boulders that had been washed into the roads. It was definitely a trip to remember!

Overall the trip to Joshua Tree National Park was so much fun. The storm was unexpected and very scary but luckily no one was hurt. I would love to go back to the northern end of the park so I could actually see a Joshua Tree. But, I got the next best thing. At the visitor center they were selling Joshua Tree seeds. So of course I bought a pack so I can have my very own Joshua tree! Follow me on Instagram @adventuresinlife.blog to see updates on the tree’s growth!

I hope you found this post helpful and if you have any questions about the trip feel free to comment below. Also, I know your all wondering, Fluffy the Kangeroo Rat survived the storm. We saw Fluffy the next morning:) Check out my instagram for a video of Fluffy. Happy Travels!

***disclaimer: I am not responsible for content on external sites.

Julian, Ca


Hello everyone!

In celebration of being back in California, today I will be writing about Julian, California. Julian is a cozy little town located about an hour and fifteen minutes from San Diego. Julian started as a mining town after gold was first discovered in 1869.  Today the town is famous for its pies…and they are amazing! So,  in honor of the upcoming fall season a trip to Julian to get some pies seemed like the perfect thing to do.

MOM’s Pies

Depending on which direction you are coming from, Mom’s Pies is located before/after the main historic district of Julian. If you are coming from San Diego, Mom’s Pies is located after the historic district. If you are coming from Temecula, Murrieta, or Los Angeles it is located before the historic district area. This cute little bakery in my opinion is the best place to get pie! You can buy a whole pie or by the slice. If you buy a single slice of pie you can add a scoop of ice cream to go with it. And my favorite part… they have cinnamon ice cream! It is delicious, creamy and a perfect match for the variety of apple pies available at MOMs.

Historic District of Julian

IMG_20180925_175335_296

This cute little one street strip hosts a diner, several pie shops and bakeries, a book store, and a variety of shops. The diner is cute and has a toy train that runs around a track that covers the ceiling of the restaurant. There are several historic buildings in the area and many of the shops have a guide to Julian pamphlet that has in it a free self walking tour guide.

Julian Bookhouse

The Julian Bookhouse was one of my favorite buildings mostly because I love reading. The bookhouse is a bookstore that was created inside one of the historic houses located on the main street. Each room is labeled by topic. Hardcover verse paperbacks are also separated into different rooms. If you are a book enthusiast I recommend taking some time to explore this cute store.

Julian Pie Company

The Julian Pie company is famous for their excellent pies. Unfortunately, we did not get to go to the store in the historic district due to construction. There is however a larger Julian Pie Company store located down the mountain. If you are coming from Los Angeles area this is the first pie shop you see and is located roughly 7 miles from Julian historic district.

20151002041449_IMG_0947

There are many more shops to see and if you are interested in visiting Julian, please visit: https://visitjulian.com/. Additional activities available in Julian include gold panning, antique shopping, and historical walking tours. Outside of Julian there is also the CA Wolf Center, and Lake Cuyamaca. Overall Julian is a fun place to go to for an afternoon of fun. The small town atmosphere is a nice break from the hustle and bustle of major tourist cities such as San Diego and Los Angles.

I hope this post was helpful and if you have any questions feel free to post them in the comments section below.


***disclaimer: I am not responsible for any content on external links.

Pisa, Italy

Hello everyone! It has been awhile but I hope to make up for lost time by doing several posts about cities in Italy I visited while on spring break. First up, Pisa! Pisa was much smaller than I thought it would be. The main tourist area was the Piazza Dei Miracoli which was a large grassy area that included the Leaning Tower of Pisa, the Pisa Cathedral, and Pisa Baptistery. The Piazza Dei Miracoli was declared a UNESCO World Heritage Site in 1987. I spent a total of about 2 hours in this area, but it would be easy to spend a whole afternoon exploring. To find tickets for the buildings located in the Piazza Dei Miracoli please visit: https://www.opapisa.it/en/tickets/prices/.

Leaning Tower of Pisa

2018-04-02-16-49-30

I did not go inside the Leaning Tower of Pisa but mainly focused on trying to get the perfect picture with it! This is actually very hard to do. It is a high tourist traffic area and it is very difficult to get a picture without someone in it! I recommend getting there early before a majority of the tour buses arrive.

The Pisa Cathedral

2018-04-02-16-53-25

The Pisa Cathedral was huge and made the Leaning Tower of Pisa look small in comparison. The cathedral is a medieval Roman Catholic cathedral that was finished being built in 1180. So needless to say, the church is very very old. Due to time constrains I was unable to see the inside of the church but if I go back to Pisa I will make sure to do so. The pictures I took give the church a golden hue but the actual church is almost white due to the marble it is made of.

Pisa Baptistery

2018-04-02-16-55-15

The Pisa Baptistery of St. John was completed in 1363, and is the largest baptistery in Italy. It is roughly 180 feet high! It was a very impressive sight that towered over the grassy lawn.

Overall Pisa was a fun place to visit and I felt like I saw quite a bit even though I only spent about two hours there. Next time I go I would like to spend a whole afternoon there going through each of the buildings.

I hope you found this article helpful and if you have any questions comment below. Thanks and Happy Travels!


**Disclaimer: I am not responsible for content on external websites accessed through the link provided.